Introduction and Installation
JUnit is the defacto standard for unit testing.
JUnit is part of Eclipse Java Development Tools (JDT). So, we can either install JDT via Software Updates site, or download and install Eclipse IDE for Java Developers.
Using JUnit in Eclipse Environment
1. Create a project and create a class.
This should contains the method you want to test.
public class MyString { public static String capitalize(String str) { int strLen; if (str == null || (strLen = str.length()) == 0) { return str; } return new StringBuilder(strLen) .append(Character.toTitleCase(str.charAt(0))) .append(str.substring(1)) .toString(); } } |
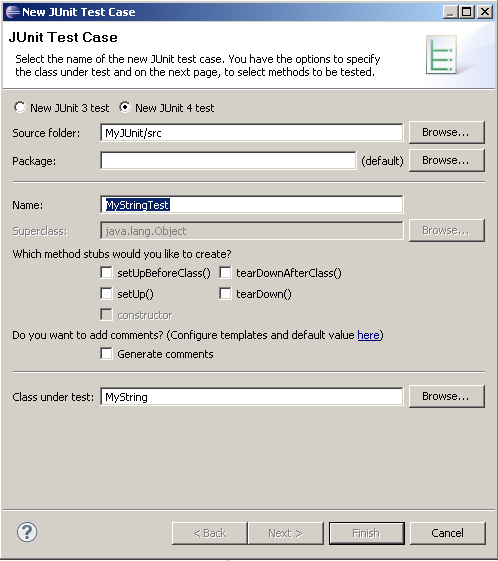
2. Create a test case by using JUnit Wizard.
Right Click the class -> new -> JUnit Test Case

Complete the steps.
Fill up the following code to the test case:
public class MyStringTest { @Test public void testMyStringCapitalize(){ assertEquals(null, MyString.capitalize(null)); //similarily we can use assertTrue() assertTrue(null == MyString.capitalize(null)); assertEquals("capitalize(empty-string) failed", "", MyString.capitalize("") ); } } |
- The annotation @Test identifies that a method is a test method which will be executed when it is run as a JUnit Test automatically.
- assertEquals method records information when the parameters are not equal
- assertTrue method records information when parameter is false
3. Run the test case as JUnit Test

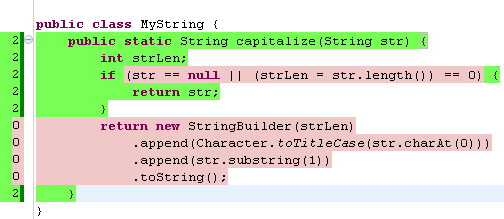
4. Use code coverage tool to check if all statements/branches are covered in your test case(s).
For example, Clover, Emma.

We can easily see that some part of the method is not covered, which means test case is not good enough.