
Bumped Assistant Library to 1.1.0 and SDK to 0.6.0
1. Headless auto start on boot.
2. Voice control of GPIOs without IFTTT, api.ai, Actions SDK (Only for Raspberry Pi Boards - non OSMC).
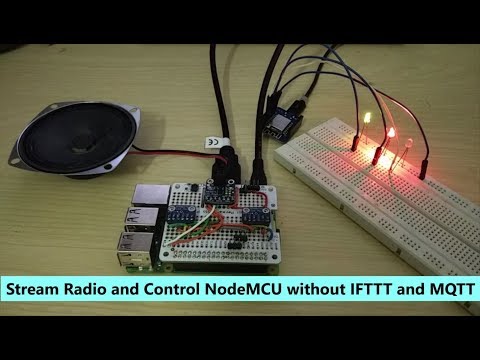
3. Voice control of NodeMCU without IFTTT and MQTT.
4. Radio streaming.
5. Voice control of servo connected to RPi GPIO (Only for Raspberry Pi Boards - non OSMC).
6. Safe shutdown RPi using voice command.
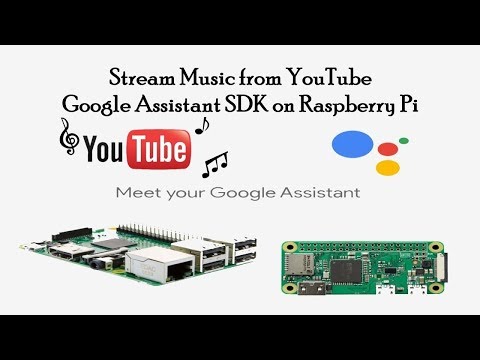
7. Stream Music from YouTube.
8. Indicator lights for assistant listening and speaking events.
9. Startup audio and audio feedback for wakeword detection.
10. Pushbutton service to stop Music or Radio playback.
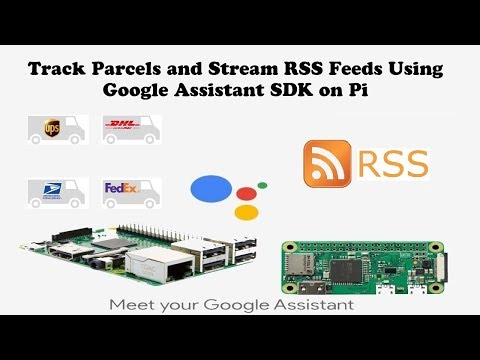
11. Parcel tracking using Aftership API.
12. RSS Feed streaming.
13. Control of Kodi or Kodi Integration.
14. Streaming music from Google Play Music.
15. Casting of YouTube Videos to Chromecast and Chromecast media control by voice.
16. Voice control of Radio/YouTube/Google Music volume levels.
17. Control Sonoff Tasmota Devices/Emulated Wemo.
18. Track Kickstarter campaigns.
19. Emulated Philips Hue HUB service and control of Emulated Hue Lights.
20. Search recipes and get push message of ingredients and link to recipe.
21. Remote control of Magic Mirror.
22. Sending voice messages from the phone to the raspberry.
23. Play your Spotify playlist.
24. Custom wakeword activation for all Pi boards.
25. Mute microphones to prevent listening to Ok-Google hotword (Only Raspberry Pi Boards - non OSMC).
26. Create custom conversations.
27. Control of lights added to Domoticz.
28. Stream music from Gaana.com.
29. Stream your playlist from Deezer.
30. Custom actions in French, Italian, German, Dutch and Spanish.
31. Send commands over MQTT to the Google Assistant (Only Armv7 boards).
32. Control Assistant using IR Remote (Only Raspberry Armv7 boards).
33. Send Voice Messages from the SBC to the Mobile using Pushbullet (Only Armv7 boards).
34. Send Clickatell SMS messages.
35. CES 2019 Like Live Translator or Interpreter (Needs Cloud Speech).
36. Control Demoticz, Sonoff devices from other assistant devices.
Raspberry Pi users please use the latest Raspbian Desktop/Lite image- Link. Other board users please use the lastest Armbian image- Link
sudo apt-get install git
git clone https://github.com/shivasiddharth/GassistPi sudo apt-get updateRestart Pi and change directory
cd /home/${USER}/ Choose the audio configuration according to your setup.
Non-Raspberry Pi users, choose the USB-DAC option.
The speaker-test command is used to initialize alsa, so please do not skip that.
AIY-HAT and CUSTOM-HAT users, please reboot the Pi at places mentioned, else it will lead to audio and taskbar issues.
3.1. USB DAC or USB Sound CARD users,
sudo chmod +x ./GassistPi/audio-drivers/USB-DAC/scripts/install-usb-dac.sh
sudo ./GassistPi/audio-drivers/USB-DAC/scripts/install-usb-dac.sh
speaker-test
3.2. AIY-HAT users,
sudo chmod +x ./GassistPi/audio-drivers/AIY-HAT/scripts/configure-driver.sh
sudo ./GassistPi/audio-drivers/AIY-HAT/scripts/configure-driver.sh
sudo reboot
cd /home/${USER}/
sudo chmod +x ./GassistPi/audio-drivers/AIY-HAT/scripts/install-alsa-config.sh
sudo ./GassistPi/audio-drivers/AIY-HAT/scripts/install-alsa-config.sh
speaker-test
3.3. USB MIC AND HDMI users,
sudo chmod +x ./GassistPi/audio-drivers/USB-MIC-HDMI/scripts/configure.sh
sudo ./GassistPi/audio-drivers/USB-MIC-HDMI/scripts/configure.sh
sudo reboot
cd /home/${USER}/
sudo chmod +x ./GassistPi/audio-drivers/USB-MIC-HDMI/scripts/install-usb-mic-hdmi.sh
sudo ./GassistPi/audio-drivers/USB-MIC-HDMI/scripts/install-usb-mic-hdmi.sh
speaker-test
3.4. USB MIC AND AUDIO JACK users,
sudo chmod +x ./GassistPi/audio-drivers/USB-MIC-JACK/scripts/usb-mic-onboard-jack.sh
sudo ./GassistPi/audio-drivers/USB-MIC-JACK/scripts/usb-mic-onboard-jack.sh
speaker-test
3.5. CUSTOM VOICE HAT users,
sudo chmod +x ./GassistPi/audio-drivers/CUSTOM-VOICE-HAT/scripts/install-i2s.sh
sudo ./GassistPi/audio-drivers/CUSTOM-VOICE-HAT/scripts/install-i2s.sh
sudo reboot
cd /home/${USER}/
sudo chmod +x ./GassistPi/audio-drivers/CUSTOM-VOICE-HAT/scripts/custom-voice-hat.sh
sudo ./GassistPi/audio-drivers/CUSTOM-VOICE-HAT/scripts/custom-voice-hat.sh
speaker-test
3.6. RESPEAKER HAT users,
git clone https://github.com/shivasiddharth/seeed-voicecard
cd ./seeed-voicecard/
sudo ./install.sh
sudo reboot
speaker-test
Those using any other DACs or HATs install the cards as per the manufacturer's guide and then you can try using the USB-DAC config file after changing the hardware ids
Restart Pi
Check the speaker using the following command
speaker-test -t wav <img src="http://img.youtube.com/vi/pC4WLy45Zok/0.jpg" alt="Detailed Youtube Video" width="240" height="180" border="10" />
Place the credentials file in/home/${USER}/ directory DO NOT RENAME
Use the one-line installer for installing Google Assistant
3.1 Change directory
cd /home/${USER}/ 3.2 Make the installer Executable
sudo chmod +x ./GassistPi/scripts/gassist-installer.sh3.3 Execute the installer. When Prompted, enter your Google Cloud console Project-Id, A name for your Assistant and the Full Name of your credentials file, including the json extension.
sudo ./GassistPi/scripts/gassist-installer.shCopy the google assistant authentication link from terminal and authorize using your google account
Copy the authorization code from browser onto the terminal and press enter
After successful authentication, the Google Assistant installation will finish.
Open the service files in the /GassistPi/systemd/ directory and verify your project and model ids and save the file.
Change directory
cd /home/${USER} Make the service installer executable
sudo chmod +x ./GassistPi/scripts/service-installer.sh sudo ./GassistPi/scripts/service-installer.sh Enable the service
sudo systemctl enable gassistpi.service Start the service
sudo systemctl start gassistpi.service RESTART and ENJOY
At any point of time, if you wish to manually start the assistant:
Ok-Google Hotword/Pi3/Pi2/Armv7 users
Open a terminal and execute the following:
/home/${USER}/env/bin/python -u /home/${USER}/GassistPi/src/main.py --device_model_id 'replace this with the model id' --project_id 'replace this with the project id'
Pushbutton/Pi Zero/Pi B+ and other users
Open a terminal and execute the following:
/home/${USER}/env/bin/python -u /home/${USER}/GassistPi/src/pushbutton.py --device-model-id 'replace this with the model id' --project-id 'replace this with your project id'
Insert your Project Id and Model Id in quotes in the mentioned places
At any point of time, if you wish to stop the auto start of the assistant:
Open a terminal and execute the following:
sudo systemctl stop gassistpi.service
sudo systemctl disable gassistpi.service Change directory
cd /home/${USER}/ Make the update script executable
sudo chmod +x /home/${USER}/GassistPi/scripts/update.shRun the update script
sudo /home/${USER}/GassistPi/scripts/update.shIf there is an update available, the project will be updated else the script will make a smooth exit.
If the Project is updated, reconfigure the config.yaml file.
The script makes a backup before updating eg. GassistPi.bak-20xx-xx-xx
Major custom actions have been provided with a control key or switch in the config.yaml.
Set it to "Enabled" to enable the custom actions and set it to "Disabled" to disable them.
Languages supported: French, Italian, Spanish, Dutch, German and Swedish.
In the config.yaml file, under the Languages and Choice option set your desired language.
Use the Translated versions of the English syntaxes given for all the custom actions.
NOTE: THIS MAKES USE OF GOOGLE CLOUD SPEECH API. FREE USAGE IS LIMITED TO 60MINS/MONTH. FOR MORE DETAILS ON THE USAGE LIMITS CHECK THIS LINK
Command Syntax:
To start the interpreter:
"Hey Google, Start Your_Desired_Language interpreter.
To stop the interpreter:
"Hey Google, Stop Your_Desired_Language interpreter.
NOTE: GOOGLE CLOUD TEXT TO SPEECH HAS A LIMITED USAGE ACCESS. ONCE THE QUOTA IS EXHAUSTED, THE PROJECT WILL AUTOMATICALLY SWITCH TO gTTS.
<img src="https://drive.google.com/uc?id=1NXd0bvsoBNevY7oh9IeTRfBZ_MWla2Iy" width="600" height="400" border="1" />
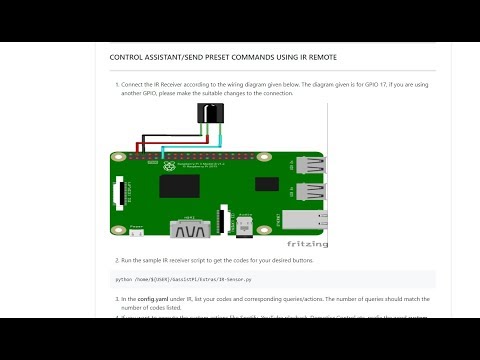
python /home/${USER}/GassistPi/Extras/IR-Sensor.py Video for reference:
<img src="http://img.youtube.com/vi/LlbcjkRuQZk/0.jpg" alt="Detailed Youtube Video" width="240" height="180" border="10" />
<img src="http://img.youtube.com/vi/Ce2Djxx9shU/0.jpg" alt="Detailed Youtube Video" width="240" height="180" border="10" />
For more details on the how to use this feature, refer to the video below:
<img src="http://img.youtube.com/vi/oemsmrdhNP8/0.jpg" alt="Detailed Youtube Video" width="240" height="180" border="10" />
NOTE: As a roundabout approach, I have programmed the assistant to get the playlist details using Deezer API and then fetch those tracks from YouTube.
This feature uses a YouTube Data API v3.
Note: The same API key can be used for Kickstarter, YouTube and Gaana feature.
Syntax:
NOTE: As a roundabout approach, I have programmed the assistant to get the playlist details using web requests and then fetch those tracks from YouTube.
This feature uses a custom search engine as well as YouTube Data API v3.
Note: The same API key can be used for Kickstarter and YouTube feature.
Syntaxes:
Note - It is necessary to Say the full "Gaana.com", otherwise the assistant will pick it up as Ghana (a country).
To play the playlists added in config.yaml file:
Hey Google, Play playlist playlist-number from Gaana.com
Example: Hey Google, Play playlist 1 from Gaana.com
To play other playlists:
Hey Google, Play user-playlist-query from Gaana.com
As of today, you can control lights and switches only, more controls will be added in the future.
NOTE: Spotify API currently only supports playback in a web browser, but DRM content is being blocked in the Raspberry Pi. As a roundabout approach, I have programmed the assistant to get the playlist details using Spotipy API and then fetch those tracks from YouTube. This custom program has a better accuracy than spotify playlist playback using mpsyt.
Syntax: Hey Google, Play Your Spotify Playlist Name from Spotify
A custom Google search engine for Kickstarter has been used. This requires an API to be added to your existing project.
Note: The same API key can be used for YouTube and Gaana, but YouTube Data v3 API must be added to the project in the cloud console.
Syntax: Hey Google, (What is the status of) or (Track) Your Desired Campaign Name Kickstarter campaign
Credits for the Emulated Hue to Marius Motea.
Follow the guidelines given in the diyHue's Wiki to setup the Emulated Hue Service.
Download sketches for your NodeMCU/Wemos/ESP Devices from here
After making suitable modifications and uploading the sketches to your device, open the device's webgui by entering the ip address in a browser. In that change the "Startup" value from "Last State" to "Off" as shown below.
<img src="https://drive.google.com/uc?id=1_5QSs7Bm9TeXgazmTdvwiL34yNXot4AV" width="300" height="600" border="1" /> | <img src="https://drive.google.com/uc?id=14mPEptFRBwwv1AmsH3qORCCez63uU1LM" width="300" height="600" border="1" />
Depending upon your device, download the Philips Hue App for either of the platforms from the following links.
<img src="https://drive.google.com/uc?id=1k6IjneSQ0P6wRaHt8rjfNBiC7Y3iVGlV" alt="Apple App Store Philips Hue App" width="200" height="80" border="1" /> <img src="https://drive.google.com/uc?id=1Qh6tdhcxZTRPOvkL1lptdbvdTiHRM7Vq" alt="Google Play Philips Hue App" width="200" height="80" border="1" />
To pair a new device to diyHue, first head to http://{IP_ADDRESS}/hue/linkbutton.
The default username is Hue and password is Hue.
At this point you should open the Hue app on your phone and start searching for hubs.
To speed this up you can click the Help button and then enter the IP address of your diyHue device.
Once the bridge has been detected, click the green Set up button. At this point, the app will prompt you to press the link button on your Hue bridge.
To do so, click the Activate button on the web page you loaded at the start.
The Hue app should now prompt you through the rest of the setup. For specific details on how to setup specific lights, browse the lights section in the navigation bar to the right.
Command Syntax:
To turn lights on/off : "Hey Google, Turn Hue-Light-Name On/Off"
To change light colour: "Hey Google, Change Hue-Light-Name colour to Required-Colour" (List of available colours is given at the end of readme doc)
To change brightness : "Hey Google, Change Hue-Light-Name brightness to Required-Brightness-Level"
For pushing voice messages, the GassistPi uses Pushbullet API. To use this feature:
Command Syntax:
"Hey Google, Send message"
To use this, get a free account at clickatell.com. Sign in to Clickatell SMS Platform. Create sms integration. Add your generated clickatell api no in config.yaml.
Command Syntax: "Hey Google, send clickatell 'message' to 'Bob'
GassistPi uses Edamam for getting recipe details/info. To use this feature:
Command Syntax:
"Hey Google, Get ingredients for Required-Item"
You can control either Magic Mirror running on another Pi or Magic Mirror running on the same pi as GassistPi.
As a prerequisite, you should have the remote control module installed in the Pi running Magic Mirror.
Enter the Ip address of Pi running Magic Mirror in the config.yaml against the variable "mmmip" declared.
Command Syntax:
To show/hide weather module : "Hey Google, Show/Hide Weather on Magic Mirror"
To turn magic mirror display on/off : "Hey Google, Turn Magic Mirror display on/off"
To power off/reboot/restart Magic Mirror: "Hey Google, Power off/Reboot/Restart Magic Mirror"
Connect LEDs with colours of your choice to GPIO05 for Listening and GPIO06 for Speaking Events.
Connect a pushbutton between GPIO23 and Ground. Single press mutes microphone and double press stops music streaming.
The default GPIO and shutdown trigger word is trigger. It should be used for controlling the GPIOs, servo and for safe shutdown of Pi.
It has been intentionally included to prevent control actions due to false positive commands. If you wish to change the trigger word, you can replace the 'trigger'in the main.py code with your desired trigger word.
The default keyword for servo motor is servo. For example, the command trigger servo 90 will rotate the servo by 90 degrees.
If you wish to change the keyword, you can replace the 'servo' in the action.py script with your desired keyword for the motor.
For safe shutdown of the pi, command is: trigger shutdown
You can define your own custom actions in the actions.py script.
THE ACTIONS SCRIPT OF THIS PROJECT IS DIFFERENT FROM AIY KIT's SCRIPT, COPY PASTING THE COMMANDS FROM AIY's ACTION SCRIPT WILL NOT WORK HERE. FOR A BETTER UNDERSTANDING OF THE ACTIONS FILE, FOLLOW THE FOLLOWING YOUTUBE VIDEO.
<img src="http://img.youtube.com/vi/-MmxWWgceCg/0.jpg" alt="Detailed Youtube Video" width="240" height="180" border="10" />
There are two ways to control NodeMCU:
Download the Arduino IDE code for Nodemcu from here: https://github.com/shivasiddharth/iotwemos/blob/master/Google-Home-NodeMCU.ino
Add the wifi credentials, make the desired changes and upload the Arduino code onto the NodeMCU and get the IP address from the serial monitor.
Add the NodeMCU's IP address in the config.yaml.
Syntax: "Hey Google, Trigger Turn Devicename On/Off"
FOR GUIDELINES ON MODIFYING THE ARDUINO CODE AND ACTIONS.PY FILE, FOLLOW THE FOLLOWING YOUTUBE VIDEO.
<img src="http://img.youtube.com/vi/ae0iwJ62uaM/0.jpg" alt="Detailed Youtube Video" width="240" height="180" border="10" />
Download the Tasmota firmware from this link
Follow the instructions in this video to upload the firmware properly.
<img src="http://img.youtube.com/vi/MzcAS-K_TRU/0.jpg" alt="Detailed Youtube Video" width="240" height="180" border="10" />
Pi3 and Pi Zero users, assign the device names and device ip addresses in the config.yaml in the marked locations.
Syntax: "Hey Google, Turn Devicename On/Off"
It is also possible to switch several devices at the same time. Syntax: "Hey Google, Turn Devicename1 Devicename2 ... On/Off"
Advantage of using Sonoff-Tasmota over webserver is that, with Sonoff-Tasmota you can emulate a Wemo switch and control the NodeMCU using Amazon Alexa (Echo Devices) in addition to the GassistPi.
Default command for casting YouTube videos is Play Desired Video on Chromecast, with Chromecast as the trigger word. Example: Hey Google, Play MasterChef Season 1 Episode 1 on Chromecast casts the MasterChef YouTube Video.
Note: YouTube casting to Chromecast using third party scripts has been blocked, so I have taken a roundabout approach and as a result, you may not find the usual YouTube interface on Chromecast.
First, add the IP-Address of your Chromecast in the actions.py script, in the indicated location.
Following are the default commands for controlling Chromecast with Chromecast as the trigger word.
Pausing:
Hey Google, Pause Chromecast
Resuming:
Hey Google, Resume Chromecast
Stopping: Hey Google, End Chromecast
Change volume up/down:
Hey Google, Chromecast Volume Up/Down
You can change volume and pause or resume the Radio/YouTube/Google Music by voice.
Pausing:
Hey Google, Pause Music (Entire phrase Pause Music is the trigger)
Resuming:
Hey Google, Resume Music (Entire phrase Resume Music is the trigger)
Volume Control (Music Volume is the trigger)
Increase/Decrease Volume:
Hey Google, Increase/(Decrease or Reduce) Music Volume by ( a number between 0 and 100)
If you do not specify a number, by default the volume will be increased or decreased by 10 units.
Set Volume:
Hey Google, Set/change Music Volume to ( a number between 0 and 100)
Set volume to Maximum/Minimum:
Hey Google, Set/change Music Volume to maximum/minimum
Change Tracks:
Play Previous Track:
Hey google, play previous
Hey google, play previous song
Hey google, play previous track
Play Next Track:
Hey google, play next
Hey google, play next song
Hey google, play next track
The updated music streaming features autoplaying of YouTube suggestions. This makes use of the YouTube Data API v3.
Note: The same API key can be used for Kickstarter Tracking and Gaana, but Custom Search API must be added to the project in the cloud console.
Music streaming has been enabled for both OK-Google and Custom hotwords/wakewords.
| Command Syntax (Hey Google, ...) | What it does |
|---|---|
| Play I got you from youtube | Fetches Bebe Rexha's I Got You from YouTube |
| Autoplay I got you from youtube | Fetch up to 10 results for I got you and play them all |
| Play I got you playlist from youtube | Search for a playlist and randomly pick a song |
| Autoplay I got you playlist from youtube | Find the playlist and fetch up to 10 songs from it |
| Play I got you channel from youtube | Find the channel and randomly play a song from it's uploaded playlist |
| Autoplay bebe rexha channel from youtube | Find the channel and fetch up to 10 songs from it's uploaded playlist |
Due to the Pi Zero's limitations, users are advised to not use the Music streaming feature. Music streaming will send the CPU usage of Pi Zero into the orbit.
The music streaming from Google Music uses Gmusicapi.
Run the Google Music Authenticator once using:
/home/${USER}/env/bin/python -u /home/${USER}/GassistPi/Extras/gmusicauth.pyPlay all your songs in loop using the syntax: "Hey Google, Play all the songs from Google Music"
Play songs added to the user created playlist (does not include: most played playlist, thumsup playlist, etc) using the syntax: "Hey Google, Play songs from the first playlist from Google Music" Playlists are sorted by date created, if you have multiple playlists, use a similar syntax replacing first with second, third etc. Also you need to make suitable changes in the main.py (It has been commented in the script to help)
Play songs by a particular artist using the syntax: "Hey Google, Play songs by artist YOUR_ARTIST_NAME from Google Music"
Play songs from particular album using the syntax: "Hey Google, Play songs from album YOUR_ALBUM_NAME from Google Music"
Change tracks Shuffle tracks Repeat tracks
Due to the Pi Zero's limitations, and computationally intensive nature of the Google Music streaming feature, this action has not been enabled for Pi Zero.
Default keyword for streaming radio is radio. For example, play Radio 2 or play Radio One command will open the corresponding radio stream listed in the actions.py file.
Radio streaming has been enabled for both OK-Google and Custom hotwords/wakewords.
Useful links for obtaining radio streaming links:
http://www.radiosure.com/stations/
http://www.live-radio.net/worldwide.shtml
Due to the Pi Zero's limitations, users are advised to not use the Radio streaming feature. Radio streaming will send the CPU usage of Pi Zero into next galaxy.
The default keyword for tracking parcel is parcel. For example, you can say where is my parcel or track my parcel.
Regsiter for a free account with Aftership at https://www.aftership.com gnereate an API number and add parcels to the tracking list. The generated API number should be added to the actions.py at the indicated location. For a better understanding follow the attached youtube video.
<img src="http://img.youtube.com/vi/WOyYL46s-q0/0.jpg" alt="Detailed Youtube Video" width="240" height="180" border="10" />
Default keywords for playing RSS feeds is feed or news or quote. Example usage, top tech news will play the top technology news, top world news will play top news related to different countires, top sports news will play the top sports related news and quote of the day will give some quotes.
Do not mix the commands with Play as that has been associated with music streaming from YouTube.
numfeeds variable within the feed function in actions.py file is the feed limit. Certain RSS feeds can have upto 60 items and numfeeds variable limits the number of items to stream. The default value has been set to 10, which if you want can change.
In the config.yaml, under kodi, change control option from 'Disabled' to 'Enabled'.
The Kodi integration uses YouTube Data API v3 for getting video links. First step is to add the API to the project and create an API KEY.
The webserver is disabled by default and has to be manually enabled by the user.
For Kodi to play the YouTube video, you need to add and enable the YouTube Plugin on Kodi.
| Command Syntax | What it does |
|---|---|
| Hey Google, Shuffle my songs on kodi | Shuffles all the songs added to the kodi library |
| Hey Google, Play songs from Album name on kodi | Plays all the songs under the mentioned Album name |
| Hey Google, Play songs by, Artist name on kodi | Plays all the songs rendered by the mentioned artist |
| Hey Google, Play Song name song on kodi | Plays the requested song, if it has been added to the library |
| Hey Google, Play Movie name movie on kodi | Plays the requested movie, if it has been added to the library |
| Hey Google, From YouTube, Play Youtube Video on kodi | Fetches the YouTube video and plays it on Kodi |
| Hey Google, What is playing? on kodi | Tells you by voice as to what is currently playing |
| Hey Google, Repeat this or Repeat one on kodi | Repeats the current track playing |
| Hey Google, Repeat all on kodi | Changes repeat mode to all |
| Hey Google, Repeat off on kodi | Turns off Repeat |
| Hey Google, Turn Shuffle On on kodi | Turns on shuffle mode |
| Hey Google, Turn Shuffle Off on kodi | Turns off shuffle mode |
| Hey Google, Play Next on kodi | Plays the next track |
| Hey Google, Play Previous on kodi | Plays the previous track |
| Hey Google, Scroll a bit forward on kodi | Fast forwards a movie/music by a small amount |
| Hey Google, Scroll forward on kodi | Fast forwards a movie/track by a large margin |
| Hey Google, Scroll a bit backward on kodi | Rewinds a movie/track by a small amount |
| Hey Google, Scroll backward on kodi | Rewinds a movie/track by a large margin |
| Hey Google, Set volume Vol level number between 0 and 100 on kodi | Sets the volume to the mentioned number |
| Hey Google, Get volume on kodi | Tells you the current volume level by voice |
| Hey Google, Toggle mute on kodi | Either mutes or unmutes, depending on mute status |
| Hey Google, Pause on kodi | Pauses the current video/track |
| Hey Google, Resume on kodi | Resumes playing the video/track |
| Hey Google, Stop on kodi | Stops playing and closes the player |
| Hey Goolge, goto Home on kodi | Opens the appropriate menu or window mentioned |
| Hey Goolge, goto Settings on kodi | Opens the settings menu or window |
| Hey Goolge, goto Videos on kodi | Opens the videos menu or window |
| Hey Goolge, goto Weather on kodi | Opens the weather menu or window |
| Hey Google, goto Music on kodi | Opens the music menu or window |
| Hey Google, Move Up on kodi | Moves selection pointer up |
| Hey Google, Move Down on kodi | Moves selection pointer down |
| Hey Google, Move Left on kodi | Moves selection pointer left |
| Hey Google, Move Right on kodi | Moves selection pointer right |
| Hey Google, Move Back on kodi | Goes back, equivalent to esc key |
| Hey Google, Move Select on kodi | Makes a sletion, equivalent to enter key |
Change the Pin numbers in the given sketch according to your board and upload it.
Follow the circuit diagram given.
| COLOURS | LIST | ||||
|---|---|---|---|---|---|
| 'Almond' | 'Antique Brass' | 'Apricot' | 'Aquamarine' | 'Asparagus' | 'Atomic Tangerine' |
| 'Banana Mania' | 'Beaver' | 'Bittersweet' | 'Black' | 'Blizzard Blue' | 'Just Blue' |
| 'Blue Bell' | 'Blue Gray' | 'Blue Green' | 'Blue Violet' | 'Blush' | 'Brick Red' |
| 'Brown' | 'Burnt Orange' | 'Burnt Sienna' | 'Cadet Blue' | 'Canary' | 'Caribbean Green' |
| 'Carnation Pink' | 'Cerise' | 'Cerulean' | 'Chestnut' | 'Copper' | 'Cornflower' |
| 'Cotton Candy' | 'Dandelion' | 'Denim' | 'Desert Sand' | 'Eggplant' | 'Electric Lime' |
| 'Fern' | 'Forest Green' | 'Fuchsia' | 'Fuzzy Wuzzy' | 'Gold' | 'Goldenrod' |
| 'Granny Smith Apple' | 'Gray' | 'Just Green' | 'Green Blue' | 'Green Yellow' | 'Hot Magenta' |
| 'Inchworm' | 'Indigo' | 'Jazzberry Jam' | 'Jungle Green' | 'Laser Lemon' | 'Lavender' |
| 'Lemon Yellow' | 'Macaroni and Cheese' | 'Magenta' | 'Magic Mint' | 'Mahogany' | 'Maize' |
| 'Manatee' | 'Mango Tango' | 'Maroon' | 'Mauvelous' | 'Melon' | 'Midnight Blue' |
| 'Mountain Meadow' | 'Mulberry' | 'Navy Blue' | 'Neon Carrot' | 'Olive Green' | 'Orange' |
| 'Orange Red' | 'Orange Yellow' | 'Orchid' | 'Outer Space' | 'Outrageous Orange' | 'Pacific Blue' |
| 'Peach' | 'Periwinkle' | 'Piggy Pink' | 'Pine Green' | 'Pink Flamingo' | 'Pink Sherbet' |
| 'Plum' | 'Purple Heart' | "Purple Mountain's Majesty" | 'Purple Pizzazz' | 'Radical Red' | 'Raw Sienna' |
| 'Raw Umber' | 'Razzle Dazzle Rose' | 'Razzmatazz' | 'Just Red' | 'Red Orange' | 'Red Violet' |
| 'Robin's Egg Blue' | 'Royal Purple' | 'Salmon' | 'Scarlet' | 'Screamin' Green' | 'Sea Green' |
| 'Sepia' | 'Shadow' | 'Shamrock' | 'Shocking Pink' | 'Silver' | 'Sky Blue' |
| 'Spring Green' | 'Sunglow' | 'Sunset Orange' | 'Tan' | 'Teal Blue' | 'Thistle' |
| 'Tickle Me Pink' | 'Timberwolf' | 'Tropical Rain Forest' | 'Tumbleweed' | 'Turquoise Blue' | 'Unmellow Yellow' |
| 'Violet (Purple)' | 'Violet Blue' | 'Violet Red' | 'Vivid Tangerine' | 'Vivid Violet' | 'White' |
| 'Wild Blue Yonder' | 'Wild Strawberry' | 'Wild Watermelon' | 'Wisteria' | 'Yellow' | 'Yellow Green' |
| 'Yellow Orange' |
| GPIO Number (BCM) | Purpose |
|---|---|
| 25 | Assistant activity indicator for AIY Kits |
| 23 | Pushbutton to stop music/radio AIY and others |
| 05 and 06 | Google assistant listening and responding |
| 22 | Pushbutton trigger for gRPC API. Connect a pushbutton between GPIO 22 and GRND for manually triggering |
| 12,13,24 | Voice control of devices connected to GPIO |
| 27 | Voice control of servo |
| 17 | IR Sensor for preset commands |
Note: some HATS may use GPIOs 18, 19, 20, 21 for I2S audio please refer to the manufacturer's pinouts