![]()
![]()
A composable GAN API and CLI. Built for developers, researchers, and artists.
0.10 is now available in pip. Installation instructions and support are available in our discord
HyperGAN is in open beta.

Logos generated with examples/colorizer
See more on the hypergan youtube
Generative Adversarial Networks consist of 2 learning systems that learn together. HyperGAN implements these learning systems in Tensorflow with deep learning.
For an introduction to GANs, see http://blog.aylien.com/introduction-generative-adversarial-networks-code-tensorflow/
HyperGAN is a community project. GANs are a very new and active field of research. Join the community discord.
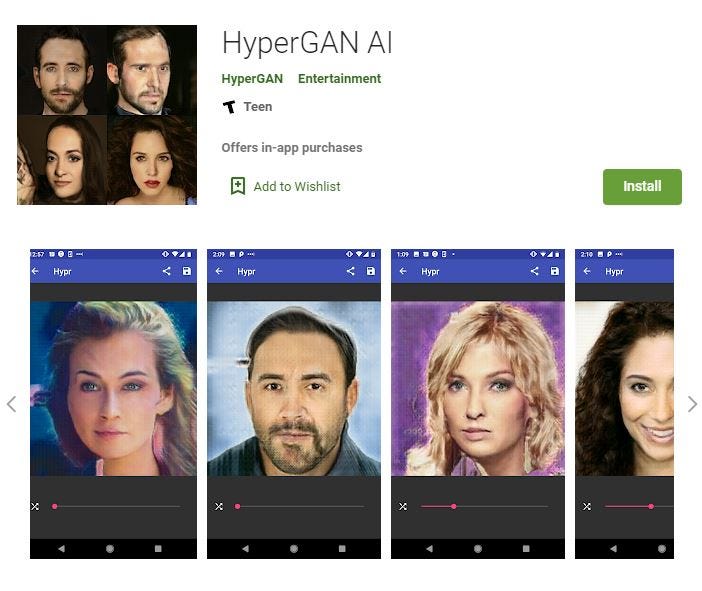
Run trained models with HyperGAN on your android device!
Submit your showcase with a pull request!
For more, see the #showcase room in ![]()
See the full changelog here: Changelog.md
Recommended: GTX 1080+
Notes
The point of this guide is to install HyperGAN with GPU support.
Installation tested and working on ElementaryOS 5.0 Juno (equivilant to Ubuntu 18.04), NVIDIA GeForce 970M.
Some restarts might be unnecessary, but do them, just to be sure.
If you follow these instructions and need further help, please visit the Discord.
Written 10.29.2019.
0.5. Disabling Secure Boot
From the "GPU Support" page, www.tensorflow.org -
"Secure Boot complicates installation of the NVIDIA driver and is beyond the scope of these instructions."
A quick Google search such as "disable secure boot {motherboard}" will get you more detailed instructions for this step.
After disabling secure boot, restart your computer.
ubuntu-driver devices.nvidia-smi.sudo dpkg -i followed by the .deb file name to finish installation.sudo apt-get install python3-pip.pip3 install hypergan tensorflow-gpu hyperchamber pillow pygame natsort nashpypip3 install numpy==1.16.4.hypergan test.virtualenv:If you use virtualenv:
  virtualenv --system-site-packages -p python3 hypergan
source hypergan/bin/activate hypergan new mymodelThis will create a mymodel.json based off the default configuration. You can change configuration templates with the -c flag.
hypergan new mymodel -lSee all configuration templates with --list-templates or -l.
  # Train a 32x32 gan with batch size 32 on a folder of folders of pngs, resizing images as necessary
hypergan train folder/ -s 32x32x3 -f png -c mymodel --resizeIf you wish to modify hypergan
git clone https://github.com/hypergan/hypergan
cd hypergan
python3 setup.py developMake sure to include the following 2 arguments:
CUDA_VISIBLE_DEVICES= hypergan --device '/cpu:0'Don't train on CPU! It's too slow.
hypergan -h # Train a 32x32 gan with batch size 32 on a folder of pngs
hypergan train [folder] -s 32x32x3 -f png -b 32 --config [name] hypergan sample [folder] -s 32x32x3 -f png -b 32 --config [name] --sampler batch_walk --sample_every 5 --save_samplesBy default hypergan will not save samples to disk. To change this, use --save_samples.
One way a network learns:
To create videos:
ffmpeg -i samples/%06d.png -vcodec libx264 -crf 22 -threads 0 gan.mp4To see a detailed list, run
hypergan -hSee the example documentation https://github.com/hypergan/HyperGAN/tree/master/examples
To build a new network you need a dataset. Your data should be structured like:
[folder]/[directory]/*.pngDatasets in HyperGAN are meant to be simple to create. Just use a folder of images.
[folder]/*.pngFor jpg(pass -f jpg)
To convert and resize your data for processing, you can use imagemagick
for i in *.jpg; do convert $i -resize "300x256" -gravity north -extent 256x256 -format png -crop 256x256+0+0 +repage $i-256x256.png;doneContributions are welcome and appreciated! We have many open issues in the Issues tab. Join the discord.
HyperGAN uses semantic versioning. http://semver.org/
TLDR: x.y.z
DCGAN - https://arxiv.org/abs/1511.06434
InfoGAN - https://arxiv.org/abs/1606.03657
Improved GAN - https://arxiv.org/abs/1606.03498
Adversarial Inference - https://arxiv.org/abs/1606.00704
Energy-based Generative Adversarial Network - https://arxiv.org/abs/1609.03126
Wasserstein GAN - https://arxiv.org/abs/1701.07875
Least Squares GAN - https://arxiv.org/pdf/1611.04076v2.pdf
Boundary Equilibrium GAN - https://arxiv.org/abs/1703.10717
Self-Normalizing Neural Networks - https://arxiv.org/abs/1706.02515
Variational Approaches for Auto-Encoding
Generative Adversarial Networks - https://arxiv.org/pdf/1706.04987.pdf
CycleGAN - https://junyanz.github.io/CycleGAN/
DiscoGAN - https://arxiv.org/pdf/1703.05192.pdf
Softmax GAN - https://arxiv.org/abs/1704.06191
The Cramer Distance as a Solution to Biased Wasserstein Gradients - https://arxiv.org/abs/1705.10743
Improved Training of Wasserstein GANs - https://arxiv.org/abs/1704.00028
More...
  HyperGAN Community
  HyperGAN, (2016-2019+),
  GitHub repository,
  https://github.com/HyperGAN/HyperGAN
HyperGAN comes with no warranty or support.