This means that you can now create video chatting applications natively on Android in a breeze. Best of all, it is fully compatible with the PubNub Javascript WebRTC SDK! That's right, you are minutes away from creating your very own cross platform video-chatting application.
NOTE: The following demo uses The PubNub Android WebRTC SDK for signaling to transfer the metadata and establish the peer-to-peer connection. Once the connection is established, the video and voice runs on public Google STUN/TURN servers.
Keep in mind, PubNub can provide the signaling for WebRTC, and requires you to combine it with a hosted WebRTC solution. For more detail on what PubNub does, and what PubNub doesn’t do with WebRTC, check out this article: https://support.pubnub.com/support/solutions/articles/14000043715-does-pubnub-provide-webrtc-and-video-chat-
WebRTC is not a standalone API, it needs a signaling service to coordinate communication. Metadata needs to be sent between callers before a connection can be established.
This metadata is transferred according to Session Description Protocol (SDP), and includes things such as:
Once signaling has taken place, video/audio/data is streamed directly between clients, using WebRTC's PeerConnection API. This peer-to-peer direct connection allows you to stream high-bandwidth robust data, like video.
PubNub makes this signaling incredibly simple, and then gives you the power to do so much more with your WebRTC applications.
You may want to have the official documentation for PnWebRTC open during the tutorial.
This blog will focus on implementing the WebRTC portion of the Android application. As such, I have created a Github repository with the skeleton of an Android app that we will be building on. I advise you to use it, or at least look at it before you begin your own project. I created this project in Android Studio and will be writing the tutorial accordingly. The instructions for those of you using Eclipse or another IDE will hopefully be similar.
Download the app template here!
The app template contains the following:
LoginActivity to create a usernameMainActivity to listen for and place callsConstants class to hold a few static final variablesChatMessages ADT to be used for user messagesChatAdapter to put user messages in a ListViewClone or fork the repository and import it into Android Studio to get started.
First off, good for you! If you wish to create your own application from scratch, follow the first step of this guide which handles the permissions and dependencies. You should at least read the other steps as well to see how coordinating pre-call events can be handled with a PubNub object.
Naturally you can assume a PubNub-WebRTC application will be using internet, camera, and a few other features. We must first grant our app permissions to use these features. Open your AndroidManifest.xml and add the following lines after the opening <manifest> tag, above the <application> tag:
<!-- WebRTC Dependencies -->
<uses-feature android:name="android.hardware.camera" />
<uses-feature android:name="android.hardware.camera.autofocus" />
<uses-feature
    android:glEsVersion="0x00020000"
    android:required="true" />
<uses-permission android:name="android.permission.CAMERA" />
<uses-permission android:name="android.permission.RECORD_AUDIO" />
<uses-permission android:name="android.permission.INTERNET" />
<uses-permission android:name="android.permission.ACCESS_NETWORK_STATE" />
<uses-permission android:name="android.permission.MODIFY_AUDIO_SETTINGS" />

<!-- PubNub Dependencies -->
<!--<uses-permission android:name="android.permission.INTERNET" />-->
<uses-permission android:name="android.permission.WAKE_LOCK" />
<uses-permission android:name="com.google.android.c2dm.permission.RECEIVE" />
<permission android:name="your.package.name.permission.C2D_MESSAGE" android:protectionLevel="signature" />
<uses-permission android:name="your.package.name.permission.C2D_MESSAGE" />
That will grand camera, mic, and internet permissions needed for this app to function properly. Now we need to add a few libraries to our project to use WebRTC. In your app's build.gradle add the following dependencies:
dependencies {
    ...
    compile 'io.pristine:libjingle:9694@aar'
    compile 'com.pubnub:pubnub-android:3.7.4'
    compile 'me.kevingleason:pnwebrtc:1.0.6@aar'
}
Sync your gradle files and you should now have Pristine's WebRTC library, the Pubnub Android SDK, and the PnWebRTC Signaling API download.
Perfect! Now we are ready to start writing some code to do our video chatting application.
In order to start facilitating video calls, you will need a publish and subscribe key. To get your pub/sub keys, you’ll first need to sign up for a PubNub account. Once you sign up, you can find your unique PubNub keys in the PubNub Developer Dashboard. The free Sandbox tier should give you all the bandwidth you need to build and test your WebRTC Application.
The PnWebRTC API is used to connect users a with WebRTC PeerConnection. However, it is important to consider the signaling to coordinate other features, like text chatting outside of the VideoChat, user statuses, or even incoming call rejection.
These types of signaling should be done with a separate PubNub object. They should also be done on a separate channel so SDP messages do not cause your app to crash. I recommend reserving a suffix like -stdby from your users, and using it as a standby channel. I suggest you make a util/Constants.java to store your Pub/Sub keys and standby suffix. Also, create a username key and a JSON call user key, which will be used as a key when we place or receive calls.
// Constants.java
public class Constants {
    public static final String STDBY_SUFFIX = "-stdby";
    public static final String PUB_KEY = "demo"; // Use Your Pub Key
    public static final String SUB_KEY = "demo"; // Use Your Sub Key
    public static final String USER_NAME = "user_name";
    public static final String JSON_CALL_USER = "call_user";
    ...
}
These values will be used throughout your app, so it is a good idea to have them stored as static final variables. You could alternatively put them in strings.xml, but it requires a little more code to access them in there.
Now we can start implementing the PubNub portion. We will first make a method initPubNub which will instantiate a Pubnub and subscribe us. Open MainActivity, and create a Pubnub instance variable. Then, at the end of onCreate add a call to initPubNub().
public class MainActivity extends Activity {
    private Pubnub mPubNub;
    ...
    public void initPubNub() {
        String stdbyChannel = this.username + Constants.STDBY_SUFFIX;
        this.mPubNub = new Pubnub(Constants.PUB_KEY, Constants.SUB_KEY);
        this.mPubNub.setUUID(this.username);
        try {
            this.mPubNub.subscribe(stdbyChannel, new Callback() {
                @Override
                public void successCallback(String channel, Object message) {
                    Log.d("MA-success", "MESSAGE: " + message.toString());
                    if (!(message instanceof JSONObject)) return; // Ignore if not JSONObject
                    JSONObject jsonMsg = (JSONObject) message;
                    try {
                        if (!jsonMsg.has(Constants.JSON_CALL_USER)) return;
                        String user = jsonMsg.getString(Constants.JSON_CALL_USER);
                        // Consider Accept/Reject call here
                        Intent intent = new Intent(MainActivity.this, VideoChatActivity.class);
                        intent.putExtra(Constants.USER_NAME, username);
                        intent.putExtra(Constants.JSON_CALL_USER, user);
                        startActivity(intent);
                    } catch (JSONException e) {
                        e.printStackTrace();
                    }
                }
            });
        } catch (PubnubException e) {
            e.printStackTrace();
        }
    }
    ...
}
This function subscribes you to the username's standby channel. When it receives a message, it pulls out the JSON_CALL_USER field, call_user. In this demo, we will create a video that simply requires you pass it your user_name in the intent. If you also provide the intent with a JSON_CALL_USER, it will try to auto-connect you to that user. You can see that we send the user to VideoChatActivity, which we will implement in Part 3.
Now that we have handled receiving calls, let us now write the code to place calls. You will need an EditText and a Button in your activity, which the template provides. When we push the button, we will invoke the function makeCall which will send a JSON message to the other user to show we would like to chat.
public void makeCall(View view){
    String callNum = mCallNumET.getText().toString();
    if (callNum.isEmpty() || callNum.equals(this.username)) {
        Toast.makeText(this, "Enter a valid number.", Toast.LENGTH_SHORT).show();
    }
    dispatchCall(callNum);
}

public void dispatchCall(final String callNum) {
    final String callNumStdBy = callNum + Constants.STDBY_SUFFIX;
    JSONObject jsonCall = new JSONObject();
    try {
        jsonCall.put(Constants.JSON_CALL_USER, this.username);
        mPubNub.publish(callNumStdBy, jsonCall, new Callback() {
            @Override
            public void successCallback(String channel, Object message) {
                Log.d("MA-dCall", "SUCCESS: " + message.toString());
                Intent intent = new Intent(MainActivity.this, VideoChatActivity.class);
                intent.putExtra(Constants.USER_NAME, username);
                intent.putExtra(Constants.CALL_USER, callNum);
                startActivity(intent);
            }
        });
    } catch (JSONException e) {
        e.printStackTrace();
    }
}
This sends a JSONObject to the other user's standby channel with the information {"call_user":"<YourUsername>"}. We then send the user to the VideoChatActivity. This will trigger the other user's PubNub callback so both users will be in VideoChatActivity calling each other. This is alright since the PnWebRTC API does not allow duplicate calls, so only the first SDP to be received will be used.
Time to begin the true PnWebRTC code! From a high level, we will access the camera, create a video renderer, and display the camera's contents on a GLSurfaceView. The WebRTC Android Library provides a simple wrapper around the Android Camera API.

To get started let's a new activity called VideoChatActivity. The XML layout for the activity should look something like this:
<!-- res/layout/activity_video_chat.xml -->
<RelativeLayout xmlns:android="http://schemas.android.com/apk/res/android"
    xmlns:tools="http://schemas.android.com/tools"
    android:layout_width="match_parent"
    android:layout_height="match_parent"
    tools:context="me.pntutorial.pnrtcblog.VideoChatActivity">

    <android.opengl.GLSurfaceView
        android:id="@+id/gl_surface"
        android:layout_height="match_parent"
        android:layout_width="match_parent" />

    <Button
        android:layout_width="wrap_content"
        android:layout_height="wrap_content"
        android:layout_margin="10dp"
        android:text="END"
        android:onClick="hangup"
        />
</RelativeLayout>
The xml here is unstyled, I would recommend using an ImageButton with a hangup icon, but for simplicity I just used the text "END". Whatever you use, note that it has the onClick function hangup. We will have to define this in our activity.
Let's open our VideoChatActivity.java now and begin coding. First, set up all the instance variables.
public class VideoChatActivity extends Activity {
    public static final String VIDEO_TRACK_ID = "videoPN";
    public static final String AUDIO_TRACK_ID = "audioPN";
    public static final String LOCAL_MEDIA_STREAM_ID = "localStreamPN";

    private PnRTCClient pnRTCClient;
    private VideoSource localVideoSource;
    private VideoRenderer.Callbacks localRender;
    private VideoRenderer.Callbacks remoteRender;
    private GLSurfaceView mVideoView;

    private String username;

    ...
}
Briefly, here is what we have:
VIDEO_TRACK_ID, AUDIO_TRACK_ID, and LOCAL_MEDIA_STREAM_ID are arbitrary tags used to identify tracks and streams.pnRTCClient is the PnWebRTC client which will handle all signaling for you.VideoSource is a WebRTC wrapper around the Android Camera API to handle local video.VideoRenderer.Callbacks are used to render media streams to the GLSurfaceView.GLSurfaceView if the Graphics Library Surface View, made to have content rendered to it.Constants.USER_NAME.Most of the logic from here on out will be located in VideoChatActivity#onCreate. If you get lost at any point, reference the VideoChatActivity from my AndroidRTC project. First, we will get out username from the intent.
// VideoChatActivity#onCreate()
Bundle extras = getIntent().getExtras();
if (extras == null || !extras.containsKey(Constants.USER_NAME)) {
    Intent intent = new Intent(this, MainActivity.class);
    startActivity(intent);
    Toast.makeText(this, "Need to pass username to VideoChatActivity in intent extras (Constants.USER_NAME).",
            Toast.LENGTH_SHORT).show();
    finish();
    return;
}
this.username  = extras.getString(Constants.USER_NAME, "");
This will simply send a user back to MainActivity if they did not attach a username to the intent. If it has a username, it sets the instance variable.
Then, we will have to begin using some WebRTC components, namely PeerConnectionFactory. We use this to set up global configurations for our app.
// VideoChatActivity#onCreate()
PeerConnectionFactory.initializeAndroidGlobals(
        this,  // Context
        true,  // Audio Enabled
        true,  // Video Enabled
        true,  // Hardware Acceleration Enabled
        null); // Render EGL Context

PeerConnectionFactory pcFactory = new PeerConnectionFactory();
this.pnRTCClient = new PnRTCClient(Constants.PUB_KEY, Constants.SUB_KEY, this.username);
Take a moment to admire your first PnWebRTC Client. Currently, it has default video, audio, and PeerConnection configurations. No need to customize them for this app. However, if you wish to in the future, the README of the PnWebRTC Repo has some useful information on the Client if you care to look.
The end goal of capturing Video and Audio sources locally, is to create and attach them to a MediaStream. We then attach this MediaStream to any outgoing PeerConnections that we create. That is how video and audio are streamed from peer to peer with WebRTC. Before we can attach the video and audio, we have to create a VideoTrack and an AudioTrack.
// VideoChatActivity#onCreate()
// Returns the number of cams & front/back face device name
int camNumber = VideoCapturerAndroid.getDeviceCount();
String frontFacingCam = VideoCapturerAndroid.getNameOfFrontFacingDevice();
String backFacingCam  = VideoCapturerAndroid.getNameOfBackFacingDevice();

// Creates a VideoCapturerAndroid instance for the device name
VideoCapturerAndroid capturer = VideoCapturerAndroid.create(frontFacingCam);

// First create a Video Source, then we can make a Video Track
localVideoSource = pcFactory.createVideoSource(capturer, this.pnRTCClient.videoConstraints());
VideoTrack localVideoTrack = pcFactory.createVideoTrack(VIDEO_TRACK_ID, localVideoSource);

// First we create an AudioSource then we can create our AudioTrack
AudioSource audioSource = pcFactory.createAudioSource(this.pnRTCClient.audioConstraints());
AudioTrack localAudioTrack = pcFactory.createAudioTrack(AUDIO_TRACK_ID, audioSource);
Note that I got the name of both front and back facing camera, you can pick which you would like to use, we only end up using from facing in this demo. Our PeerConnectionFactory instance helps us get at video and audio sources. These require configurations, such as max width and height of video. We will be using the PnWebRTC defaults for this tutorial.
Since we have our resources now, we can create our MediaStream.
// VideoChatActivity#onCreate()
MediaStream mediaStream = pcFactory.createLocalMediaStream(LOCAL_MEDIA_STREAM_ID);

// Now we can add our tracks.
mediaStream.addTrack(localVideoTrack);
mediaStream.addTrack(localAudioTrack);
Again, LOCAL_MEDIA_STREAM_ID is just an arbitrary value. The MediaStream object is now ready to be shared. The last step before we start signaling and opening video chats is to set up our GLSurfaceView and renderers.
// Then we set that view, and pass a Runnable to run once the surface is ready
VideoRendererGui.setView(mVideoView, null);

// Now that VideoRendererGui is ready, we can get our VideoRenderer.
// IN THIS ORDER. Effects which is on top or bottom
remoteRender = VideoRendererGui.create(0, 0, 100, 100, VideoRendererGui.ScalingType.SCALE_ASPECT_FILL, false);
localRender = VideoRendererGui.create(0, 0, 100, 100, VideoRendererGui.ScalingType.SCALE_ASPECT_FILL, true);
We first point the VideoRendererGui at our GLSurfaceView. Then we set up two renderers. A renderer will take a VideoTrack and display it on the GL Surface. Setting up a renderer requires:
VideoRendererGui.create(x, y, width, height, ScaleType, mirror?)Here x and y are starting position with (0,0) being the top left. The width and height are percentages of the GLSurfaceView. For ScaleType I used SCALE_ASPECT_FILL, and I only chose to mirror (flip) the local stream. The only thing left to do now is set up the PnWebRTC Signaling.
Signaling relies almost entirely callbacks, so take a moment and read about all the callbacks offered by PnWebRTC. Your app's functionality relies on your implementation of a PnRTCListener. Take a moment to think about app design and how you should use these callbacks. PnRTCListener is an abstract class, so you need to extend it and only override the methods you plan on using. I recommend using a nested private class so you have access to all of VideoChatActivity's views.
public class VideoChatActivity extends Activity {
  // VCA Code
  private class MyRTCListener extends PnRTCListener {
    // Override methods you plan on using
  }
}
We will only be using onLocalStream, onAddRemoteStream, and onPeerConnectionClosed for this tutorial. Let's start with onLocalStream to make our GLSurfaceView display our local video stream when we attach it to our PnWebRTCClient.
@Override
public void onLocalStream(final MediaStream localStream) {
    VideoChatActivity.this.runOnUiThread(new Runnable() {
        @Override
        public void run() {
            if(localStream.videoTracks.size()==0) return;
            localStream.videoTracks.get(0).addRenderer(new VideoRenderer(localRender));
        }
    });
}
We simply attach a renderer to our stream's VideoTrack. Here we use localRender which we created at the end of step 3.4. Now, if we receive a PeerConnection that has a peer's MediaStream attached to it, we probably want to display it fullscreen and make a thumbnail for ourselves.
@Override
public void onAddRemoteStream(final MediaStream remoteStream, final PnPeer peer) {
VideoChatActivity.this.runOnUiThread(new Runnable() {
@Override
public void run() {
Toast.makeText(VideoChatActivity.this,"Connected to " + peer.getId(), Toast.LENGTH_SHORT).show();
try {
if(remoteStream.videoTracks.size()==0) return;
remoteStream.videoTracks.get(0).addRenderer(new VideoRenderer(remoteRender));
VideoRendererGui.update(remoteRender, 0, 0, 100, 100, VideoRendererGui.ScalingType.SCALE_ASPECT_FILL, false);
VideoRendererGui.update(localRender, 72, 72, 25, 25, VideoRendererGui.ScalingType.SCALE_ASPECT_FIT, true);
}
catch (Exception e){ e.printStackTrace(); }
}
});
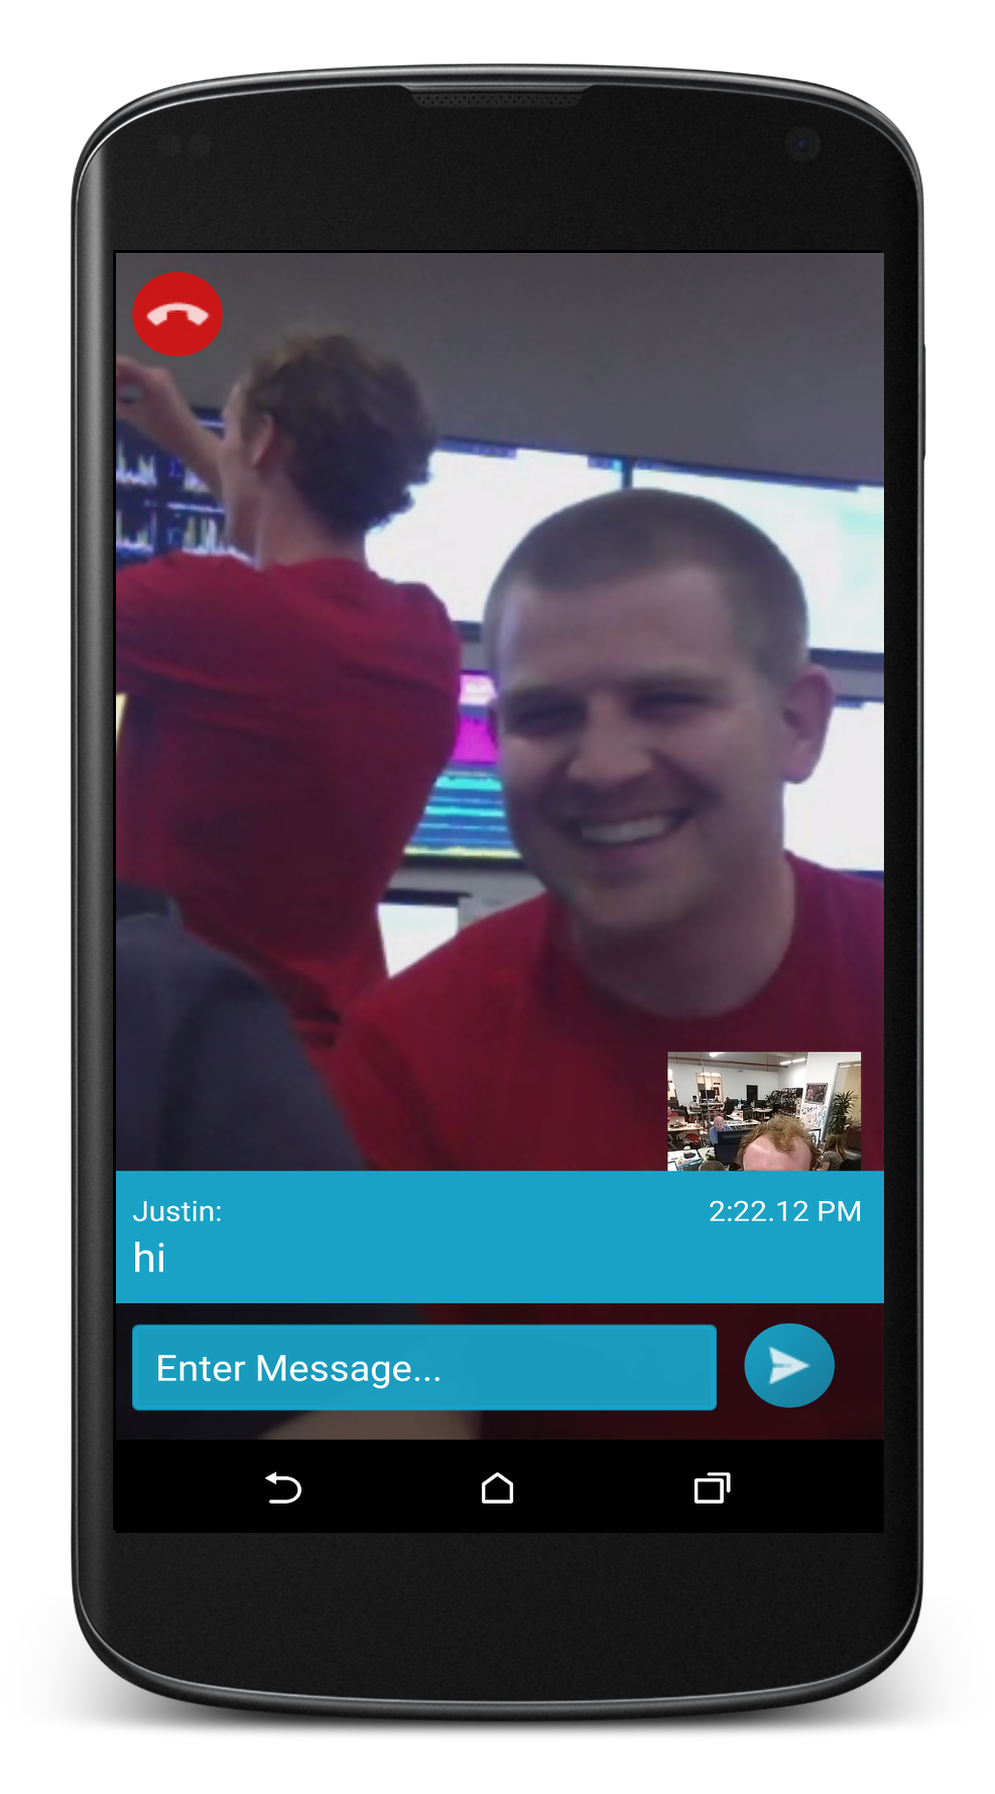
}After ensuring that our peer has offered a VideoTrack, we attach the remote stream to our remoteRender. We then update the sizes of the renderers. This will display the remote user fullscreen and a mirrored image of your stream in the bottom right of the GL Surface. The final piece to our RTC Listener is handling hangups.
@Override
public void onPeerConnectionClosed(PnPeer peer) {
    Intent intent = new Intent(VideoChatActivity.this, MainActivity.class);
    startActivity(intent);
    finish();
}
For this demo we will return to the MainActivity when a peer closes the RTC Connection. The last thing we need to do is attach our PnRTCListener to our PnRTCClient. At the very end of VideoChatActivity#onCreate, add the following lines:
// VideoChatActivity#onCreate()
// First attach the RTC Listener so that callback events will be triggered
this.pnRTCClient.attachRTCListener(new MyRTCListener());
this.pnRTCClient.attachLocalMediaStream(mediaStream);

// Listen on a channel. This is your "phone number," also set the max chat users.
this.pnRTCClient.listenOn(this.username);
this.pnRTCClient.setMaxConnections(1);

// If Constants.CALL_USER is in the intent extras, auto-connect them.
if (extras.containsKey(Constants.CALL_USER)) {
  String callUser = extras.getString(Constants.CALL_USER, "");
  connectToUser(callUser);
}
This code attaches an instance of your listener to the Signaling Client. Then we attach our MediaStream to the Client as well, which will trigger our onLocalStream callback. We then begin to listen for calls on our username, and, for this demo, we set our max allowed PeerConnections to 1. Finally, we auto-connect to a user is a Constants.CALL_USER was in the intent extras.
Lastly, don't forget to implement that hangup button we created.
public void hangup(View view) {
    this.pnRTCClient.closeAllConnections();
    startActivity(new Intent(VideoChatActivity.this, MainActivity.class));
}
The client has a closeAllConnections and a closeConnection(String userId) method so you can choose who to disconnect from.
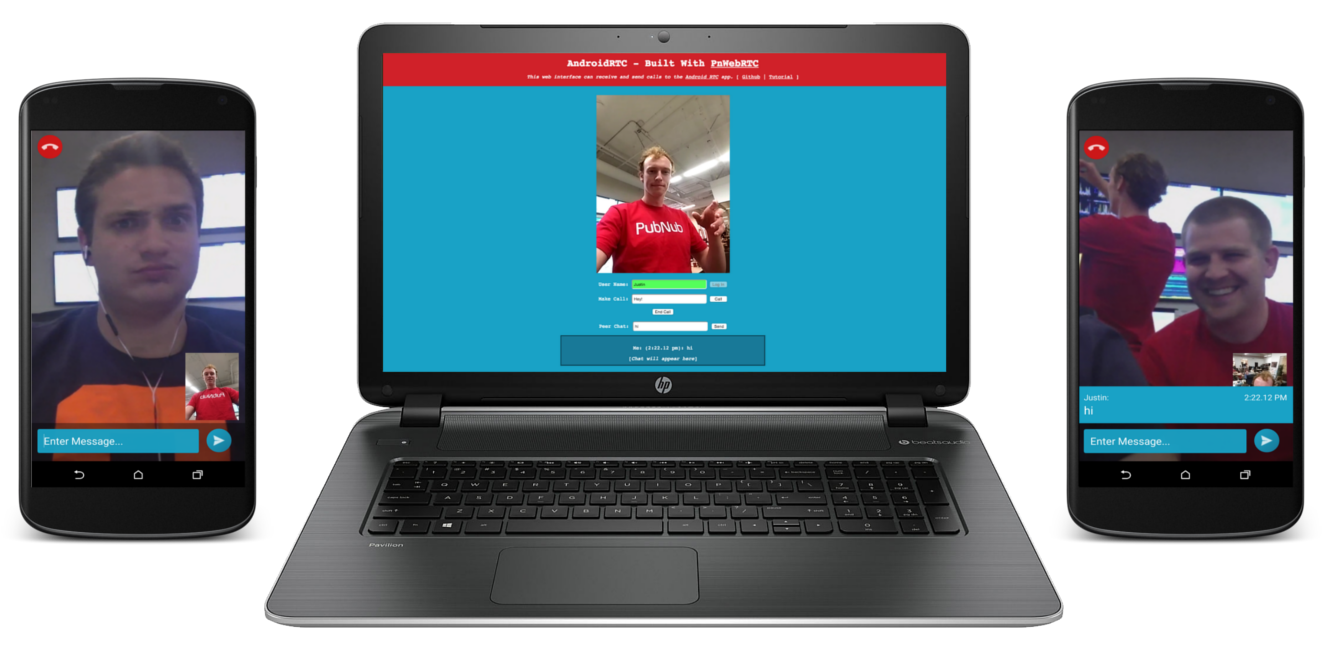
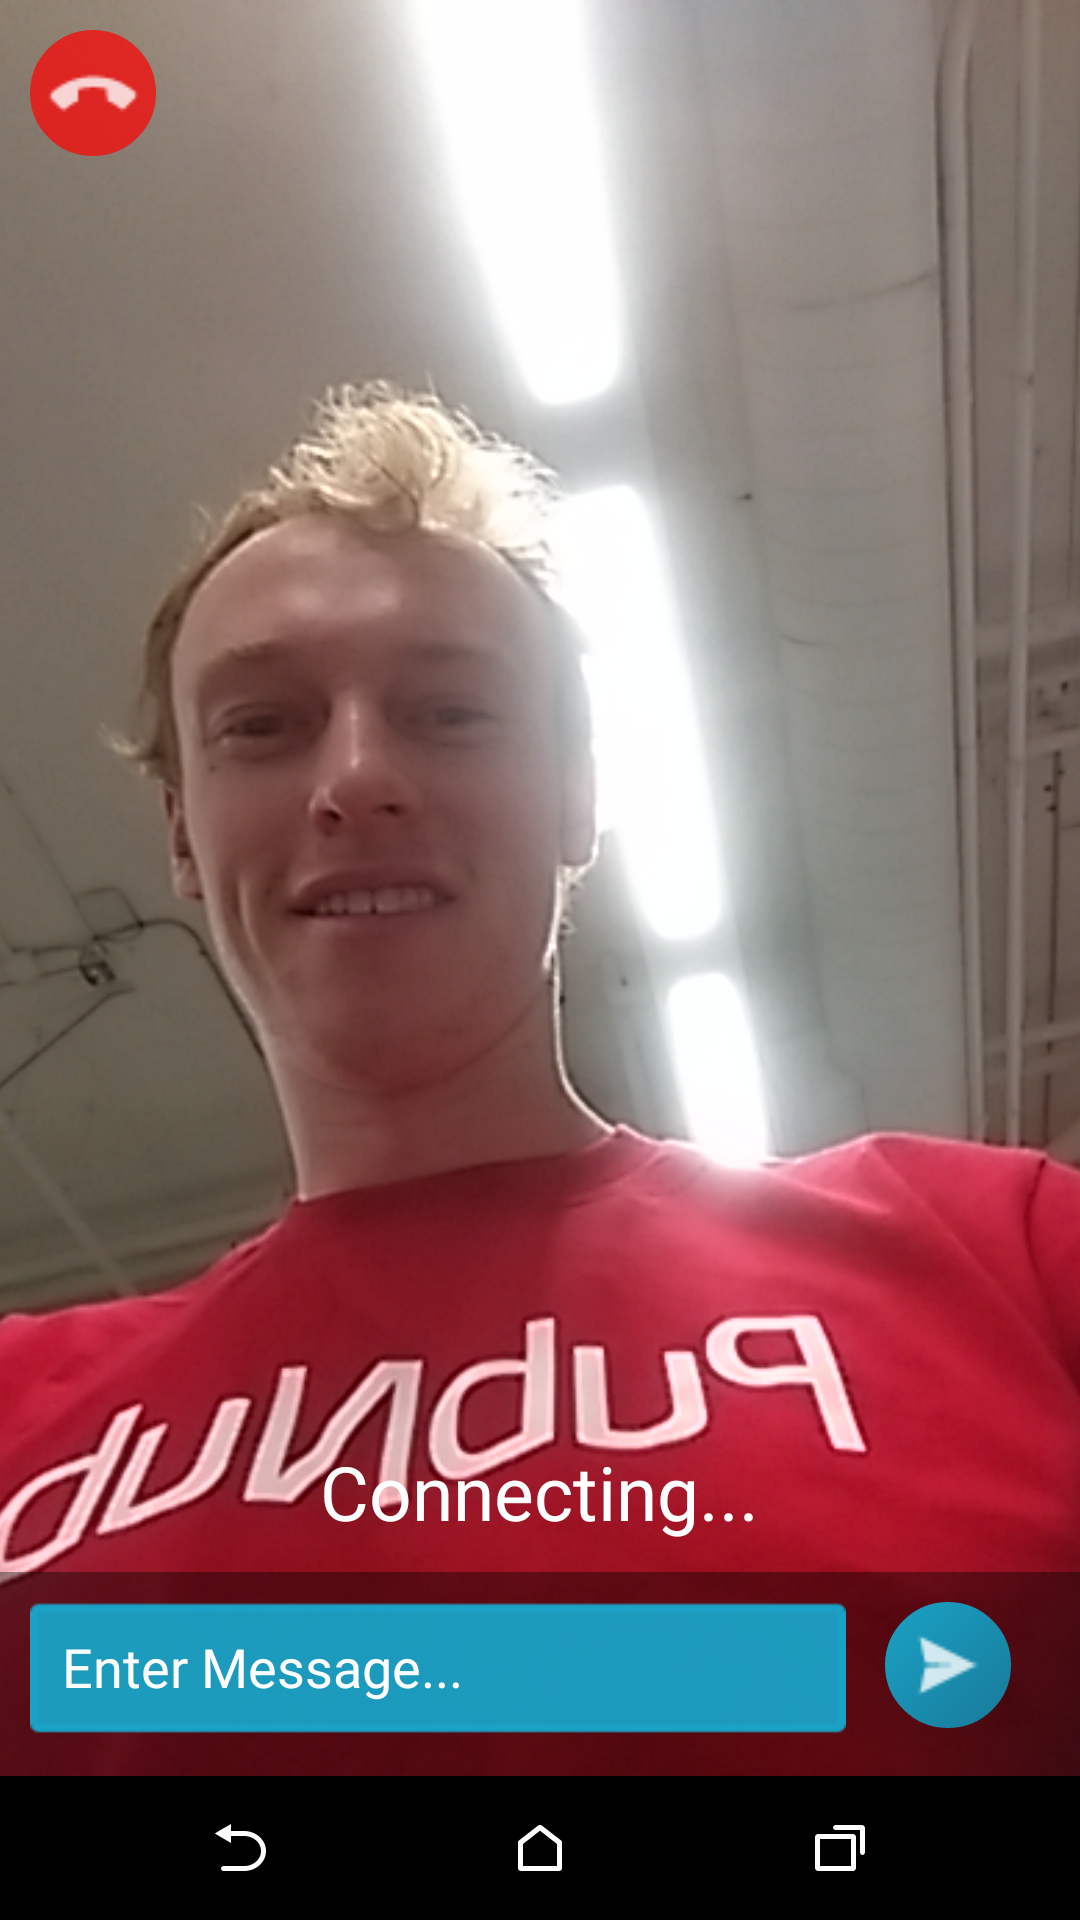
Congratulations, you made it! I have created a web interface to help you debug and test your app, try giving your phone a call then calling your phone to make sure everything is working!
This is all optional, but most likely it will be necessary for your WebRTC Android Apps. Chances are you will want to stop the camera when you background the app, and start it up again when you resume, and you will want to close all connections and stop sharing media when you leave the activity.
@Override
protected void onPause() {
    super.onPause();
    this.mVideoView.onPause();
    this.localVideoSource.stop();
}

@Override
protected void onResume() {
    super.onResume();
    this.mVideoView.onResume();
    this.localVideoSource.restart();
}

@Override
protected void onDestroy() {
    super.onDestroy();
    if (this.localVideoSource != null) {
        this.localVideoSource.stop();
    }
    if (this.pnRTCClient != null) {
        this.pnRTCClient.onDestroy();
    }
}
This code will solve most of those issues for you. The PnRTCClient will handle connection cleanup if you call its onDestroy. The WebRTC library will handle cleanup for the camera and mic resources in onDestroy. For the most part, if you try your own cleanup, you will likely receive an error.
Say you want to exchange custom information in your app, whether that be chat or game scores of some sort. You can accomplish this by transmitting user messages with the PnRTCClient. For simplicity's sake, I'm not going to get into creating views and buttons for messaging, but I will cover the messaging protocol. For this example, we will be sending a JSON user message of the form {"msg_user":"Username","msg_text","Hello RTC!"}. The function to send a message might look like this:
private void sendMsg(String msgText){
    JSONObject msgJson = new JSONObject();
    try {
        msgJson.put("msg_user", username);
        msgJson.put("msg_text", msgText);
        this.pnRTCClient.transmitAll(msgJson);
    } catch (JSONException e){
        e.printStackTrace();
    }
}
The PnRTCClient has two transmit functions. First, transmitAll(JSONObject msg) sends the message to all Peers you are connected with. Second is transmit(String userId, JSONObject msg), which sends the message only to the specified peer.
Receiving and handling custom data between users is as simple as implementing the PnRTCListener's onMessage callback.
@Override
public void onMessage(PnPeer peer, Object message) {
    if (!(message instanceof JSONObject)) return; //Ignore if not JSONObject
    JSONObject jsonMsg = (JSONObject) message;
    try {
        String user = jsonMsg.getString("msg_user");
        String text = jsonMsg.getString("msg_text");
        final ChatMessage chatMsg = new ChatMessage(user, text);
        VideoChatActivity.this.runOnUiThread(new Runnable() {
            @Override
            public void run() {
                Toast.makeText(VideoChatActivity.this,chatMsg.toString(),Toast.LENGTH_SHORT).show();
            }
        });
    } catch (JSONException e){
        e.printStackTrace();
    }
}
This will receive the JSON, and make a Toast message with the json information. Notice that I use a custom ADT, ChatMessage, to hold the data. It is good practice for streaming data in an Android app to turn it into a native object. If you want to test your messaging, fork the gh-pages branch of the tutorial repo, there is a commented out section in the html for your messaging. You will have to implement the sendMessage function.
If we're being honest, I'm impressed you scrolled down this far. If you've made it here chances are that you want some more information, so I'll lay out some resources.