This example shows:
The business example is a very simple order fullfillment microservice (motivated by the flowing retail example):

With Camunda it is possible to run the engine as part of your application or microservice. This is called embedded engine. This is especially helpful in microservice architectures if you develop in Java, then the engine simply gets a library helping you to define flows with persistent state and subsequent requirements like timeout handling, retrying, compensation and so on. See Why service collaboration needs choreography AND orchestration for background reading.

This video gives a very quick walk through the example (15 minutes):
The project uses
Please have a look at the pom.xml for details. Also note the Application.java as Spring Boot starter class.
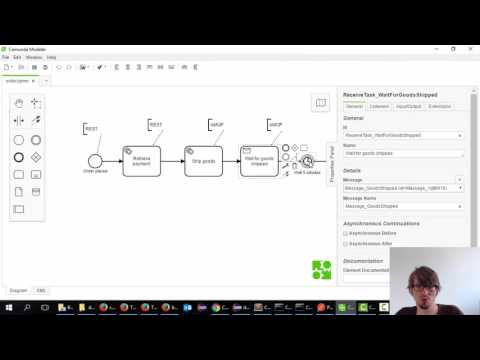
With Spring Boot Camunda gets auto-configured using defaults. You can easily change the configuration by providing classes according to the docs. In this example you can see
The example uses the community edition to allow for a quick start. It is easy to switch dependencies to use the Enterprise Edition as you can see in this commit. Just make sure you can connect to the Camunda Nexus using your enterprise credentials.
One extremly interessting piece is the JUnit test case, which does a complete run-thorugh the process, including all Java code attached to the process, but without sending any real AMQP message or REST request. The timeout of a waiting period in the process is also simulated.
    StartingByStarter starter = Scenario.run(orderProcess) //
      .startBy(() -> {
        return orderRestController.placeOrder(orderId, 547);
      });

    // expect the charge for retrieving payments to be created correctly and return a dummy transactionId
    mockRestServer
        .expect(requestTo("http://api.example.org:80/payment/charges")) //
        .andExpect(method(HttpMethod.POST))
        .andExpect(jsonPath("amount").value("547"))
        .andRespond(withSuccess("{\"transactionId\": \"12345\"}", MediaType.APPLICATION_JSON));

    when(orderProcess.waitsAtReceiveTask("ReceiveTask_WaitForGoodsShipped")).thenReturn((messageSubscription) -> {
      amqpReceiver.handleGoodsShippedEvent(orderId, "0815");
    });

    when(orderProcess.waitsAtTimerIntermediateEvent(anyString())).thenReturn((processInstance) -> {
      processInstance.defer("PT10M", () -> {fail("Timer should have fired in the meanwhile");});
    });

    // OK - everything prepared - let's go
    Scenario scenario = starter.execute();

    mockRestServer.verify();

    // and very that some things happened
    assertThat(scenario.instance(orderProcess)).variables().containsEntry(ProcessConstants.VARIABLE_paymentTransactionId, "12345");
    assertThat(scenario.instance(orderProcess)).variables().containsEntry(ProcessConstants.VAR_NAME_shipmentId, "0815");

    {
      ArgumentCaptor<Message> argument = ArgumentCaptor.forClass(Message.class);
      verify(rabbitTemplate, times(1)).convertAndSend(eq("shipping"), eq("createShipment"), argument.capture());
      assertEquals(orderId, argument.getValue());
    }

    verify(orderProcess).hasFinished("EndEvent_OrderShipped");
Refer to the OrderProcessTest.java for all details. Note that the test generates a graphical report:

In order to get started just
Clone or download this example
Maven build (this also runs the test cases)
mvn clean installInstall RabbitMQ and start it up
Run microservice via Java:
java -jar target/camunda-spring-boot-amqp-microservice-cloud-example-0.0.1-SNAPSHOT.jarNow you can access:
curl --request POST -F 'orderId=1' -F 'amount=500' http://localhost:8080/orderOf course you can also use your favorite IDE.
You can easily deploy a Spring Boot application to various cloud providers, as you get a fat jar runnable on every JVM.
And using the Spring Cloud Connectors the application can be magically wired with cloud resources.
The example I show here is:
camunda-dbcloud-amqpAll metadata for the deployment are described in the manifest.yml:
---
applications:
  - name: camunda-spring-boot-amqp-microservice-cloud-example
    memory: 1G
    instances: 1
    random-route: false

services:
  - cloud-amqp
  - camunda-db
Now you can easily deploy the application using the CloudFoundry CLI. After logging in you can simply type:
mvn clean install && cf push -p target/camunda-spring-boot-amqp-microservice-cloud-example-0.0.1-SNAPSHOT.jarThere it is, now you can start a process:
url -X POST -F 'orderId=123' -F 'amount=4990' http://camunda-spring-boot-amqp-microservice-cloud-example.cfapps.io/orderAnd will see it in cockpit:

The URL to access the Camunda web applications and your REST-API depends on various factors, but will be shown via the Pivotal console:

