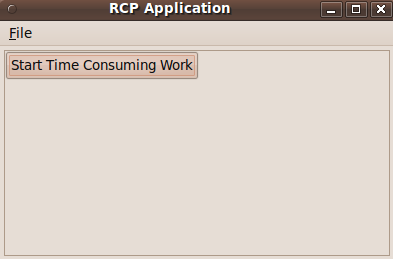
This tutorial is about eclipse Job and it consists two parts. The first part introduces how to make a progress bar by using a simple example. The second part briefly illustrates Eclipse Job for background processing.
1. A Simple Example of Progress Bar in Eclipse
Suppose you have a working RCP application with a sample “Hello World” menu and corresponding action. (This can be done in no time by using eclipse extension wizard)
To report progress of some executable task, the following classes are required:
1. org.eclipse.core.runtime.jobs.Job
(Jobs are units of runnable work that can be scheduled to be run with the job manager. Once a job has completed, it can be scheduled to run again)
2. org.eclipse.core.runtime.IProgressMonitor
To have a taste of how a progress bar looks like, simply replace the run method with the following code. It does not do a real job, but only mimic a real task.
public void run(IAction action) { Job job = new Job("Test Job") { @Override protected IStatus run(IProgressMonitor monitor) { // Set total number of work units monitor.beginTask("start task", 100); for (int i = 0; i < 10; i++) { try { Thread.sleep(1000); monitor.subTask("doing " + i); // Report that 10 units are done monitor.worked(10); } catch (InterruptedException e1) { e1.printStackTrace(); } } return Status.OK_STATUS; } }; job.schedule(); } |
Add the following statement to preWindowOpen method of ApplicationWorkbenchWindowAdvisor class.
public class ApplicationWorkbenchWindowAdvisor extends WorkbenchWindowAdvisor { public ApplicationWorkbenchWindowAdvisor(IWorkbenchWindowConfigurer configurer) { super(configurer); } public ActionBarAdvisor createActionBarAdvisor( IActionBarConfigurer configurer) { return new ApplicationActionBarAdvisor(configurer); } public void preWindowOpen() { IWorkbenchWindowConfigurer configurer = getWindowConfigurer(); configurer.setInitialSize(new Point(400, 300)); configurer.setShowCoolBar(false); configurer.setShowStatusLine(false); configurer.setTitle("RCP Application"); configurer.setShowProgressIndicator(true); } } |
2. Enable Background Processing
Suppose you have a Rich Client Application with a view and a button. When the button is clicked, a time-consuming work will be started.
If this expensive job is implemented in a straightforward way, i.e. implemented in main thread, then the view of the application will not be responsive. If you click other menu or button, no one will respond. This could be annoying for a lot of users and make then believe they need to kill the process.
public void createPartControl(Composite parent) { Composite top = new Composite(parent, SWT.NONE); // setup the layout of top to be GridLayout. GridLayout layout = new GridLayout(); layout.marginHeight = 0; layout.marginWidth = 0; top.setLayout(layout); Button button = new Button(top, SWT.PUSH); button.setText("test button"); Listener listener = new Listener() { public void handleEvent(Event event) { //expensive job below for (int i = 0; i < 10; i++) { try { Thread.sleep(2000); System.out.println(i); } catch (InterruptedException e) { e.printStackTrace(); } } } }; button.addListener(SWT.Selection, listener); } |
One possible solution is creating multiple threads and then synchronize each other. This should work but there is an easy way which is provided by Eclipse Platform.
Under Eclipse, we can put time-consuming work into a Job. The Job class, provided in the org.eclipse.core.runtime plug-in, allows clients to easily execute code in a separate thread. In addition, a progress monitor bar can be added easily.
Listener listener = new Listener() { public void handleEvent(Event event) { Job job = new Job("test") { @Override protected IStatus run(IProgressMonitor monitor) { monitor.beginTask("start task", 100); //time consuming work here doExpensiveWork(monitor); //sync with UI syncWithUI(); return Status.OK_STATUS; } }; job.setUser(true); job.schedule(); } }; |
doExpensiveWork and syncWithUI are defined as the following:
private void doExpensiveWork(IProgressMonitor monitor) { // mimic a long time job here for (int i = 0; i < 10; i++) { try { //give a progress bar to indicate progress monitor.worked(10); Thread.sleep(2000); System.out.println("step: " + i); } catch (InterruptedException e) { e.printStackTrace(); } } } private void syncWithUI() { Display.getDefault().asyncExec(new Runnable() { public void run() { MessageDialog.openInformation(getSite().getShell(), "message", "completed!"); } }); } |
asyncExec allows the calling thread to be asynchronous with the calling thread. The caller of this method continues to run in parallel, and is not notified when the runnable has completed.
Instead we can use syncExec, in which case the thread which calls this method is suspended until the runnable completes.
The difference is apparent in this demo. syncExec has to wait user to click “OK” button to complete, while asyncExec does not.
Reference
